Last Updated on
Decorating yourself can be a great cost-saving exercise. It can also be rewarding and help develop your DIY skills. One of the hardest decorating tasks is removing wallpaper. Without the correct tools and know-how, it can be a nightmare!
Enter the wallpaper stripper! In order to remove wallpaper effectively, a steamer is a brilliant device to have. It reduces the work and effort required and allows you to strip wallpaper and not damage the wall. In this guide, we look at how does a wallpaper stripper work, including the device and a useful how-to guide.
Part 1: The Basic Components of a Wallpaper Stripper
Let’s first look at the basic design of a wallpaper stripper. These tools make stripping paper incredibly easy. Once you comprehend the procedure and the components, using them is also very straightforward. There are generally three main parts of such a tool – the body, the plate, and other accessories.
Main Body
The body is the main part of this tool, and it almost looks like the body of a hoover. Within this body, there is a water tank. It is where the hot water is warmed and steam generated. The water tank is connected to a pipe/tube that eventually connects to the steam plate. Before you use a wallpaper steamer, you must first fill the water tank and allow it to heat the water.
Steam Plate
The steam plate looks similar to a hoover head. It is usually a flat plastic plate that is connected to the pipe projecting from the main body and water tank. On the back of the plate, there is a handle so that you can grip it. The plate also has a vent where the steam escapes. You point this vent flat onto your walls to direct the steam onto the wallpaper. Sometimes this section is the size of an a4 piece of paper and is flat with a handle on the back.
Accessories
Many popular steamers also come with a range of accessories. These are typically different head attachments for the pipe. For example, many tools come with a separate brush attachment that you can use to brush your walls with once the surface of the paper has been removed. Some may also contain extension poles to extend the reach of the plate.
Part 2: The Process and Science Behind a Wallpaper Stripper
As you can see, this type of device is relatively simple in its construction. But how does it work? Wallpaper is generally stuck to walls using some adhesive. This wallpaper paste or glue can loosen when put under intense heat.
It is why a steamer is so effective. It utilizes the intense heat from steam to loosen the wallpaper paste, so removing the wallpaper is easy. The basic process is listed below:
- The wallpaper stripper tank is filled with water
- The device is turned on, and the water is heated
- As the water boils, steam is generated
- Steam is directed through the pipe and out of the plate
- The steam is directed onto the wallpaper
- It penetrates through the wallpaper and onto the adhesive
- The adhesive is loosened, allowing you to remove the paper from the wall
Simple! As you will see below, the method is a little more involved than this, but the above is the basic process and science when using a wallpaper stripper.
Part 3: Using a Wallpaper Steamer
Now that you understand how a stripper works, we can look at how to use one effectively and safely. As mentioned, these are relatively simple devices. However, there are other considerations you must be aware of. These include the suitability of your walls, preparation, and what to do after the paper is removed.
Step 1: Are Your Walls and Paper Suitable For Steaming?
Before even investing in a steamer, you must look at the suitability of your walls and paper.
Walls
You can generally steam wallpaper on any wall. However, it is essential to understand the type of wall. It can affect how much pressure and steam you apply. Plasterboard is a weaker material and the main wall type to look out for. If you hold a steamer on wallpaper on plasterboard for too long, you risk weakening the wall. You must hold it long enough to allow the steam to work but not too long to avoid damage.
Other types of walls, like brick, breezeblock, or plaster on brick are generally fine for steaming and stripping.
Paper
Wallpaper is generally split into two main categories – porous and non-porous. Porous wallpaper, like wood chipping paper, allows water through it. It means the steam can penetrate properly and work on the adhesive.
Alternatively, non-porous paper-like vinyl paper is resistant to water. Don’t worry; you can still use a wallpaper steamer on vinyl paper and other types. However, a little preparation is required, which is described in the below steps before using the stripper.
Step 2: Wall and Room Preparation
First, you must make sure your room is protected. If possible, we advise moving as much furniture as possible from the room. It can be a messy task, and you would not want to damage your furniture. For any furniture which is too large to remove, cover it with a dust sheet. Also, place dust sheets on the floor to protect your carpet and make cleaning easier. You could also consider removing light switches and fixtures so that they don’t get damaged.
This next step depends on the type of wallpaper you have. If you have non-porous wallpaper, as mentioned above, you must prepare it. As non-porous wallpaper does not let water through, you must create holes so that the water can reach the adhesive.
To do this, you need a scoring tool like a putty knife. You are using it to score the wallpaper at regular intervals. It is essential to cover the entire walls. Be careful only to score the paper and not press too hard. If you do, you risk scratching the plaster beneath. By scoring the wallpaper, the steam will be able to penetrate through and tackle the adhesive properly.
Step 3: Preparing the Wallpaper Stripper
Before stripping wallpaper, you must first prepare the steamer. We first advise reading the instructions thoroughly. The instructions will show a clear diagram of the stripper. They should also demonstrate how to use it and essential things like the maximum water level.
First, locate the water unit and fill it with water up to the maximum level. Next, turn the device on, and let the water warm. Again, the instructions should state how long the water takes to heat and for steam to generate. Once the steam is generated from the plate, you can start using the device to remove wallpaper!
Step 4: Using the Stripper to Remove Wallpaper
The actual stripping is relatively easy. Once the steamer is prepared and steam is generating, place the steam plate flat to the wall and hold it there for 10-15 seconds. After this, remove the plate and pull the paper.
Hopefully, it should pull easily. However, if it is still tough and resistant, you may need to hold the plate on the walls for longer than 15 seconds. It is a simple case of trial and error. Once you have found an ideal time, you can repeat this process for the rest of your wall. Be careful when working around switches and sockets. It could be ideal to leave gaps between switches and sockets so you don’t risk electrocution.
Also, consider your starting point. The best method is to start in the corner of a room, at the bottom of a wall. It will allow steam to travel upwards and make removing wallpaper easier as you work upwards.
Step 5: Post-Stripping Work
Although you have removed the wallpaper, there may still be flakes and a light covering underneath the plaster. It is, therefore, essential to clean the walls afterwards and give the surface a final brush.
The best tools for this task are either a scraper or a brush with stiff bristles. Starting from the top, brush with pressure down the length of the walls—work from top to bottom to minimize the mess. By brushing or scraping the exposed surface, you should be able to remove any remaining glue, paper, and dust.
If you see that there is still wallpaper paste on the walls, you may also need to use paste remover. You can find adhesive removal in any DIY store. Usually, you have to mix a solution of remover and water. Once mixed, you can then brush it over the walls and allow it to work for the specified time. The solution will loosen and dissolve the adhesive. After the set time, you can then use a scraper to remove any excess adhesive and solution from the walls.
Step 6: Cleaning
The work is done, nearly! You have hopefully now completed your wallpaper removal. The walls should be looking fantastic and ready to be redecorated! Now comes the last step – the clean-up. Yes, we know that this is a chore, but it’s essential if you want your room to look nice.
Hopefully, your dust sheets should have captured most of the loose paper, dust, and debris. Remove any old paper and recycle it if possible. We advise hoovering over the dust sheets before removing them. It should pick up any messy debris and stop it from going underneath onto your floor. Remove the sheet and give the floor a final hoover.
Safety Advice
If you want to use a wallpaper steamer, you must be aware of the potential dangers. When using the unit, you are working with boiling water and hot steam. Both of these things can easily burn and scold your body.
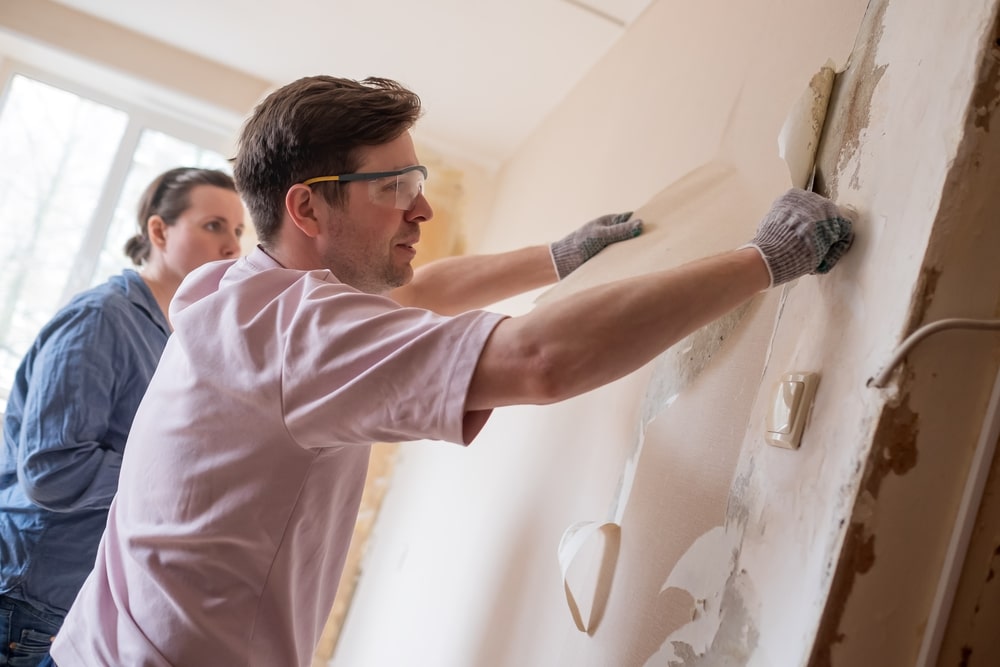
There are a few simple things you can do to avoid this. First, wear gloves! Waterproof gloves are essential for removing wallpaper with a steamer. This is because boiling water or hot steam could easily burn your hands when you are holding the plate.
Next, always keep the main unit on a flat surface. It will make sure that no water can splash or spill and potentially cause harm. Finally, never leave the steamer unattended. If you need to leave the room, turn it off. It is also ideal for turning the steamer off and allowing it to cool if you need to refill the tank.
Wallpaper Streamer FAQs
Is a Wallpaper Steamer Worth It?
Certainly! If you do your own decorating and regularly use wallpaper, this is a great device to have. When using a wallpaper steamer, you save a lot of time and effort. It is much easier than using a scraper without the aid of any steam or hot water. However, it may not be worth it if you only have small rooms or wallpaper on a feature wall.
Which Is the Best Wallpaper Steamer?
There are many quality models available. Look for a versatile steamer that has a wide range of accessories, including a variety of brushes. Which steamer you choose depends on your personal circumstance. For example, if you are steaming large areas, you may want a device with a larger capacity tank.
Can a Wallpaper Stripper Damage Your Walls?
Yes! But this depends on the type of wall your wallpaper is attached to. Lighter walls like plasterboard are at risk if you hold the steamer on them for too long. If you hold your steamer on a plasterboard surface too long, you risk weakening the material. It could ultimately compromise the durability of your walls.
Start Removing Your Wallpaper
If you decorate often, a wallpaper steamer is a must-have device. It is specifically designed to make wallpaper removal easy. The intense blasts of steam will effectively weaken the wallpaper paste and make stripping light work. So, how does a wallpaper stripper work? You should now have a clear idea of how does wallpaper stripper work and how to use them effectively for your next decorating project!
Paul is the type of person who never met a problem he couldn’t fix. He can always be found tinkering with something in his house, even if it isn’t broken! His tips and tricks are often shared on our site. He’s the one you call when something breaks because he has been known to improvise fixes for everything from leaky faucets to malfunctioning dryers.