Last Updated on
When it comes to learning how to fit a loft ladder, there are some important steps you need to follow to make sure that everything is done correctly. After all, the last thing you want to happen is for your new loft ladder to fail you at the wrong time.
Now, you may be expecting loft ladder installation to be a tricky job, and, to be honest, that can certainly be the case. However, the best selling loft ladders do try to make the job as easy as possible since they supply you with all of the parts you need for this job to be a success.
Let’s get started
The Tools
You are going to need specific tools to make the job a whole lot easier. Now, we know that you need a loft ladder, so we won’t include that. However, putting that to one side, this is what you will need.
- Hammer
- Screwdrivers, of both types
- Tape measure
- Tenon saw
- Square
- Panel saw
- Pencils
- Knife
- Cordless drill
- Panel pins (at least 25mm in length)
- Wire nails (at least 50mm in length)
As you can see, there are not too many things, and you will have a tape measure and pretty much everything else already. But one extra note: if you have to install even the hatch opening, you may want to get a reciprocating saw. That guy is just going to make life easier when it comes to cutting out that new loft hatch.
Step By Step Guide On How to Fit a Loft Ladder
Step 1: Selecting the Location
So, the first step is deciding on where the loft opening should be. You need to remember that loft hatches are pretty sizeable, so knowing where you will install those loft ladders is important.
This step can be skipped if you don’t need to install a new loft hatch and merely try to fit a loft ladder to replace the one already there. But if you weren’t happy with the location of the last one, then a new opening is the best way to go.
With the loft hatch, make sure it’s not too close to an external wall. This isn’t because it will weaken the external wall, but it’s more to do with having enough headroom for you to get up into the loft in the first place.
To check this, think about your roof and the angle. Will the location gives you easy access, or will it involve you walking into the roof as soon as you get up into the loft?
Step 2: Marking the Position of the New Hole
The next step is to mark where the hatch is going to be positioned. You want to make a mark where the middle of the new opening is located rather than the edge. After that, you need to start to effectively punch your way through the ceiling.
Step 3: Making the First Hole
After making that first mark, you need to think about starting to create that hole. Drill a hole, and then use a reciprocating saw to cut away a small part of the plasterboard ceiling. The idea here is it then gives you a chance to check the lay of the land when it comes to the joists.
With this, you want your loft ladder to be positioned to go in the same direction as those joists. It should never be running against it.
Look to see how those joists lie in the ceiling. Then, be prepared to change the position, so your new loft ladder is then sitting perfectly in line with the joists themselves.
Step 4: Cutting the Joists
You need to possibly cut those joists, and that’s where the tenon saw comes into play.
You want to cut the joists to the length of the ladder and then add on around 100mm to give you some room to work with.
Step 5: Nailing a Trimmer
When you have the hole cut out to the size of the loft ladder, you need to nail a trimmer to each end of the opening. That’s going to help to start to create the loft hatch at the size that’s required. The trimmers you use will need to be the same size as the ceiling joists that were cut, as this also gives some added strength and support to those ceiling joists.
Step 6: If Altering an Existing Hatch
If you are actually just altering an existing loft hatch, the things you need to do will be different when fitting a loft ladder.
The main alteration people make is that the hole needs to be made larger for the new loft ladder. As before, you need to cut the joists to the length of the ladder, so measure carefully by going up to the loft floor and checking every part.
After cutting, place the trimmer onto each of the ceiling joists.
Step 7: Starting to Install a Loft Ladder
You need to deal with the box frame, which will involve measuring and marking the depth of the joists. Then mark off the dimensions on all four sides. You then need to look at cutting some wood to begin to create the box frame.
Step 8: The Wood
You should be looking at using timber that measures 50mm x 25mm and either screw it or nail it to the joists. These battens will help you create the box frame, and you do have the option of removing them later on in proceedings.
Step 9: Lifting Up the Box Frame
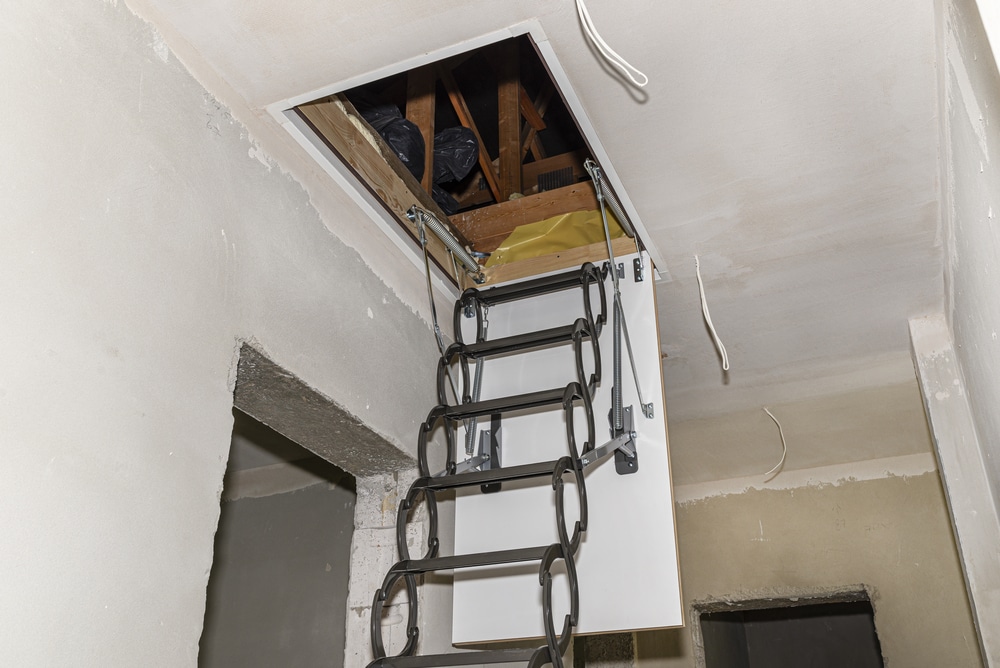
What should happen now is you have the opening into your attic, and you are ready for the actual installation of the loft ladder into its new position.
Use the battens as your guide, and lift the box frame into position. It has to be the exact size as the hole, so lift it up at an angle to get it into the attic space. It has to drop down into position for it to then be held correctly.
Check that the bottom of the box frame does not jut out from the ceilings. If it does, you have dropped it too far and need to adjust the height of the trimmings, so it sits flush.
Step 10: Checking the Ladder
With the box frame and ladder up in the attic, you need to make sure that the ladder will open in the correct direction. It’s amazing how many times people will pick up the ladder the wrong way, and it will open against a wall when it drops down. Do this check now before you secure everything in place.
Step 11: Secure the Box Frame
Once happy with the positioning, you need to secure the box frame. Drill some holes in the sides of the box frame. Have two holes on the short sides and three holes on the two longer sides. Make sure you then screw in some wood screws into the box frame, so it’s set into the joists. If you prefer to use nails, then make sure they are at least 50mm deep.
Step 12: Finishing Everything Off
Once everything is nice and secure, you need to finish the job to make it look like a professional installation. You need to deal with making a nice neat edge to the box frame, so it looks tidy from the floor in your house.
Most people will use a piece of architrave for this part, and that’s certainly a good idea. Fix the architrave to your frame using panel pins that are at least 25mm thick to ensure that you have that quality finish.
Finishing Up
And that’s how to fit a loft ladder. It may sound like a lot, and it will take you some time, but with little equipment required, this is one of those installation jobs that people with limited DIY experience should still be able to complete.
However, if you feel you may struggle with cutting the hole, then do get professional help. Getting the hole part correct is the key here as it is the way you get access to the loft. Also, make sure you use quality timber when attaching the battens to space. You don’t want to use second-rate equipment or materials for this sort of job.
Fit Your Loft Ladder
In just a few hours, you should have a new loft ladder in your house, even if you have changed the location of the old one. The days of climbing into your loft with a step ladder will be behind you, and getting access to your loft with ease means you have a whole new room to explore.
It’s now up to you to find the best loft ladder for both your needs and your loft space. Remember, this ladder assembly should not take long, but make sure you get the correct height, or you will have a major headache on your hands in more ways than one.
Paul is the type of person who never met a problem he couldn’t fix. He can always be found tinkering with something in his house, even if it isn’t broken! His tips and tricks are often shared on our site. He’s the one you call when something breaks because he has been known to improvise fixes for everything from leaky faucets to malfunctioning dryers.