Last Updated on
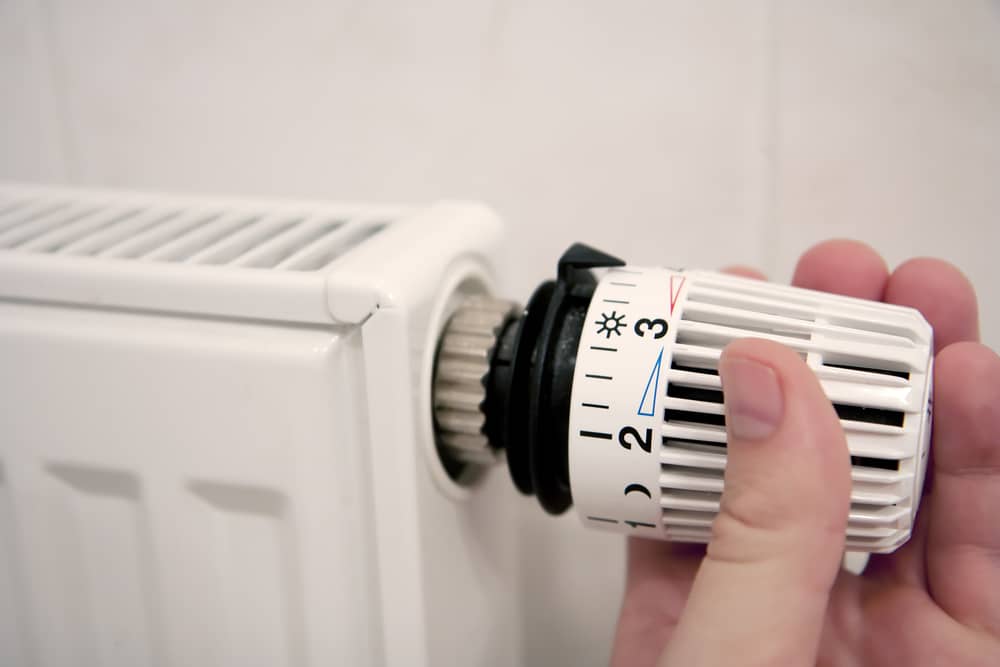
A thermostatic radiator regulates the overall temperature of a room by adjusting the flow of hot water passing through it.
Although installing a thermostatic radiator valve (TRV) on a radiator may look difficult, it is a simple do-it-yourself task. Not to mention, you can change a radiator valve in a short time.
Whether you are planning to install an electric thermostatic valve or a traditional thermostatic valve, we will show you how to fit a thermostatic radiator valve on your radiator.
Tools Needed to Fit Thermostatic Radiator Valves on a Radiator
You may need these tools to install or replace a thermostatic radiator valve on your radiator;
- Bleed key
- A container such as a bowl or a pan
- Adjustable spanner
- A pair of pliers
- Towels
Since radiators have different pipe fittings, you have to look for a thermostatic valve that is compatible with your radiator. Take a look at the TRV’s design to determine whether it will fit perfectly on the radiator that is in your house. Also, radiators have pipes and connections with different diameters. Make sure that you choose a valve that is compatible with the pipes.
Measure the pipes in different rooms to get insight into the type of valve you should use. The thermostat should fit perfectly on the TRV’s inlet and the water pipe. It will also improve the flow of water.
Step-by-Step Guide on Fitting a Thermostatic Radiator Valve on Your Radiator
Step 1: Turn off the Central Heating System
Start by turning off the heating system (boiler) to reduce the risk of bodily injuries caused by hot water in the system. Once you turn off the heating system, let the hot water cool off for about 45 minutes to 1 hour. Working on a system that has hot water can injure you. To prevent this from happening, you have to work on a system that has cold water.
You should also turn off the water to prevent excess leakages that could increase water bills.
Step 2: Turn off the Lockshield Valve to Stop Waterflow
The lockshield radiator valve is fitted on the bottom part of the radiator. In most instances, it is fitted on the radiator with a removable plastic cover cap.
Unfasten the plastic cap to gain access to the lock. Once you remove the cap, place the adjustable spanner and the pair of pliers on the spindle. Use those tools to spin it in a clockwise motion, then note the number of rotations/turns you made with the two tools.
It stops water from flowing into the radiator through the lockshield radiator valve.
Move over to the opposite end/side of the radiator, then gently turn the valve continuously in a clockwise motion till it stops moving.
If your radiator has a thermostatic valve, you should continuously turn the valve until it gets zero marks.
Step 3: Place Some Containers Under the Valve
You should place some large containers under the radiator valves that you will remove so that they can trap the water that may drain from the radiator.
Moreover, you can also place a few towels on those spots to dry some of the water droplets that might fall on the floor.
Step 4: Prep the Thermostatic Valve That You Are Going to Install
If you plan to replace an old thermostatic valve with a new valve, you have to prep it first.
To prevent any leaks in the future, cover the threads of the new thermostatic valve with special tape (PTFE tape). The PTFE tape should cover the threads completely.
Step 4: Get Rid Of the Pressure
Use the radiator bleed key to turn the radiator bleed valve until it opens up completely to get rid of the extra pressure that might have been in the radiator. After that, turn the radiator bleed key in the opposite direction to close the valve tightly.
Check whether the lockshield valve features a drain or not. If there is a drain on the lockshield, use it to drain the system and get rid of the water that might be in the radiator.
Put a container under the valve, then use an adjustable spanner to open it by turning it in a counter-clockwise motion.
Step 5: Unfasten the Nuts on the Old Valve
The next thing you need to do is to unfasten the nut on the old TRV valve.
Hold the thermostatic radiator valve with a pair of pliers and unfasten the cap nut. Make sure that you use an adjustable spanner to unfasten the nut from the connection.
You should hold the valve tightly to prevent any defects. For example, if you don’t hold the valve tightly while unfastening the nut, it might exert some pressure on the TRV’s pipework and bend it.
Step 6: Let Out the Pressure
Afterwards, the cap nut will become loose, releasing air from the radiator. Plus, water will start draining from the radiator. Put a large container under the thermostatic radiator valve to trap the water that will start to trickle down from the radiator.
Leave the container on that spot until the full volume of water drains into the container. The water may take around 4-10 minutes to drain off completely from your radiator system. Well, the amount of that time taken will be based on the radiator’s capacity and volume.
Step 7: Remove the Old TRV Valve From the Radiator
Once the full volume of water drains off completely, you have to remove the old TRV valve from the radiator. You should continue unfastening the cap nut with the adjustable spanners until the connection becomes completely weak.
Next, move to the other nut found on the bottom part of the valve, then start unfastening it. Just use the same technique that you had used earlier to unfasten that screw.
Hold the thermostatic radiator valve tightly with a pair of pliers, then unfasten the nut using the adjustable spanner until it starts to become loose. To get effective results, you have to spin the spanner in a counter-clockwise motion. Next, unfasten the nuts completely, then detach the TRV valve from the radiator’s inlets.
Step 8: Fix the New TRV Valve on the Inlets
Fixing the new valve on the radiator can be done in a short period. However, before you connect the valve to the radiator, you have to check if all the parts are in good condition or not.
If the radiator and the valve are in good condition, you can fit the new TRV valve in the same spot as the old valve.
Start by slipping the new olive and the nut on the tail of the radiator. After that, slip another olive and another nut down the water pipework connection.
Align the new valve to the tail of the radiator and the water connection pipe. This process requires maximum concentration, so you must be pretty keen while aligning the thermostatic valve body to that point.
Fix the thermostatic valve on the tail of the radiator, then fasten the cap nut slightly until it holds the valve.
You can secure it lightly on the radiator before you tighten all the connections completely.
Move to the water connection pipe and repeat the same procedure.
Once the valve is lightly secured on the radiator, hold it tightly with a pair of pliers and start tightening the nut on the tail using a strong adjustable spanner. Tighten it until it holds firmly on the connection.
Afterwards, move to the water connection pipe and tighten the fastening completely until it’s tight.
Step 9: Check Whether the Valve Works Effectively or Not
The next thing that you need to do is to check the effectiveness of the new thermostatic valve. Make sure that you close every valve that is adjusted.
You should also re-adjust the lockshield valve back to its original setting. You can do this by turning it in the same number of times you had turned it while closing it.
Next, turn on the water supply system and let water flow through the whole system. Check if the radiator valve has tight connections or not. Water should not leak on the valve as it is flowing through to other points.
Step 10: Get Rid Of Any Trapped Air
For maximum performance, you need to get rid of the air that might have been left in the radiator during the installation process. Well, you can use a bleed key to turn the bleed valve until the excess air is dispersed from the radiator.
If everything is in good condition, you can turn on your water and heating system, then control the temperature settings in your house with the help of the radiator dial. Water will refill the system in a short time. But, again, TRV’s features are better than the features of a manual radiator valve.
If you have fitted an electric valve on your radiator, you can use a thermostat to control the temperature settings and make more adjustments. Since valves have different features, go through the user manual to get an insight into your valve.
Install a New Thermostatic Radiator Valve
Well, fitting radiator valves and fitting radiator thermostat components on your heating system is quite easy.
A thermostatic valve head features a sensor that detects the temperature in a room, adjusting it to a comfortable degree. Radiator valves have different designs that are compatible with different radiator units. Choose the one that will fit perfectly on your radiator. Also, make sure that you tighten all the plumbing fittings to prevent any leakages.
Now you know how to fit a thermostatic radiator valve; however, if you are still unsure, there is no shame in asking for help.
Ian loves everything that revolves around the home improvement niche. He loves trying out new home appliances. He has also handled a lot of equipment and has a lot of insight. Plus, he’s worked on various home improvement projects that became a success.
If Ian isn’t busy working on his latest project, you can find him reading up about another one!