Last Updated on
Learning how to make a dehumidifier could save you some serious cash if you’re struggling with humidity in your house. Dehumidifiers remove excess moisture from the air, which helps to protect against the build-up of mould and mildew. However, paying for an expensive device to dehumidify a room isn’t an option for everyone.
Some people might prefer to reduce the moisture from the air with a homemade dehumidifier instead. There are plenty of excellent moisture absorbers out there that you can get your hands on if the humidity in your home seems excessive.
Today, we’re going to look at some of the tools that any homeowner can use to reduce high humidity and lower the chances of mildew and mould growth in any property. While these DIY solutions will remove moisture to a certain extent, you may also need to look into professional dehumidifier equipment if your humidity levels are particularly high.
Making Your Homemade Dehumidifier With Rock Salt
The easiest way to get rid of excess humidity and absorb moisture in your home is to use simple, natural solutions like rock salt for your dehumidifier. A bag of rock salt will cost a lot less than an electric dehumidifier. What’s more, these homemade dehumidifiers can be extremely effective, depending on your house.
What You Need
Though there are many ways to reduce the moisture in your atmosphere with a bucket and the right natural substance, rock salt is often the preferred option. To make a rock salt dehumidifier, you’ll need two large container buckets and a bag full of rock salt. Make sure you have a drill so you can create holes in one of the buckets for your homemade dehumidifier.
Rock Salt Dehumidifier Instructions
To make your dehumidifier, take your drill and place several holes in the bottom of your first bucket. You can then place this “top bucket” in another bucket. Pour the rock salt into the bucket on the top, and you have your new dehumidifier. You can place the bucket in the room you want to dehumidify.
How It Works
How the dehumidifiers work is by using rock salt to pull moisture from the air. The salt will naturally attract moisture out of the air into the top bucket, which will eventually drain through into the second bucket.
If you have a naturally damp or humid home, you might find that the bottom bowl fills with water quite quickly, so you’ll need to pull the container out and empty it from time to time. It’s also worth making sure that you occasionally replace or top up the salt in your rock salt dehumidifier.
Other Natural Dehumidifier Options
If you try the salt dehumidifying option in your bedroom or bathroom and think it doesn’t have the right results, or you want to make another tool to control moisture elsewhere, there are some other options too.
Baking Soda
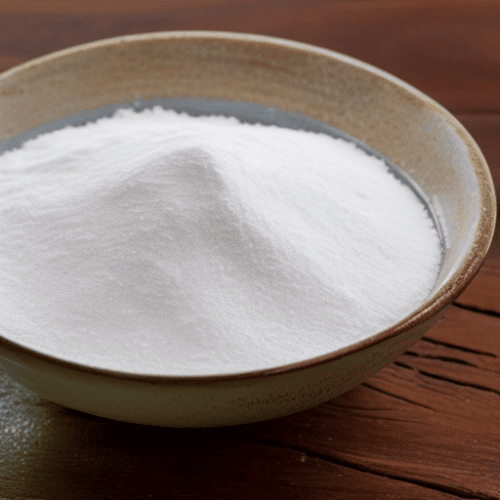
One way to handle condensation on bathroom and kitchen windows is to make a mini dehumidifier with a bowl and some baking soda.
Grab a bowl that’s small enough to fit in the area you want to reduce moisture in and fill it with baking soda. Place that bowl in the area you want to dehumidify and keep an eye on it over time. As the baking soda attracts the water from the air and becomes damp, it will harden so that you can refresh it with new baking soda after a while.
The great thing about this dehumidifier option is that it can absorb moisture without putting your health at risk in any way.
Charcoal
Another natural option if you’re struggling with a humid home and high ventilation is to make a dehumidifier with charcoal. Like salt and baking soda, charcoal is an efficient way to absorb moisture from the air. These dehumidifiers work best in a small space so that you can use them in your bathroom, basement, closets, and other small but humid areas.
To create your charcoal dehumidifier, follow these steps:
- Get a large container, like a coffee can, with its lid.
- Punch holes in the side and lid of the can and place the charcoal inside.
- Replace the lid, and place your dehumidifier into the area you want to reduce moisture in. You’ll need to replace the charcoal every so often with this method too.
Unique Homemade Dehumidifier Options
Charcoal, salt (or calcium chloride), and baking soda are some of the most common options for making a DIY dehumidifier. However, there are other tools you can use to dehumidify a room.
Calcium Chloride
If you want to get experimental, you can try other methods, like non-dairy coffee creamer or coffee whitener. This product has natural drying properties similar to calcium chloride, making it a great product for reducing moisture in the air. To create this homemade dehumidifier, all you need is a container you can fill with creamer. When the humidity in the air causes the creamer to harden, replace the contents of your DIY device.
Just like rock salt, calcium chloride is another form of homemade dehumidifier you should consider if you’re making your homemade moisture solutions. Calcium chloride is a good choice if you’re collecting a lot of moisture in a large room, making it a good choice for a basement. To create this kind of DIY dehumidifier, you’ll need an old sock, a string, and a large bowl, as well as your salt.
Fill the sock with the calcium chloride, and tie it closed with the string. Hang the sock in the area you want to remove moisture from and place the bowl underneath the sock to capture any water flowing from the room.
Silica Gel
Another simple option for dealing with humidity is simply keeping some of the silica gel packets you have around your house when you get a new pair of shoes and various other products. Silica packets are also quite easy to buy online if you’re making a dehumidifier with your moisture absorbers. Get a jar with a lid, and collect a screwdriver and your silica gel. You can use the screwdriver or a drill to make some DIY holes in the lid of the jar.
Place the silica gel in the jar, screw the lid back on, and then replace the silica gel every few weeks to get the best results. This should dehumidify any room quite well.
Tips for Creating Your Own Dehumidifier
A homemade dehumidifier is an efficient and easy-to-make solution if you’re dealing with moisture and excess water in your home.
Designing a DIY dehumidifier will help remove excess moisture in your home so that you can reduce the headache of high humidity. Too much humidity in a home can harm your health. People can suffer from things like allergies and trouble breathing due to too much moisture in the air. Finding a way to dehumidify your home can be a valuable strategy, particularly if you suffer negative side effects from excess moisture.
Before you jump into making a DIY dehumidifier, however, make sure you:
• Use the right product for the right room. Some substances, like charcoal, are better suited to smaller spaces. Make sure you’re using your dehumidifiers correctly.
• Be safe and ensure children and pets can’t get into the dehumidifiers you make. Some substances can be dangerous when consumed, like silica gel.
• Replace the contents of your dehumidifier regularly. When your dehumidifier stops removing excess water from the air, this is probably a sign you need to replace the contents of your jar or container.
Is a Homemade Dehumidifier Effective?
If you live in a house that suffers heavily from dampness and humidity, you might need to invest in an electric dehumidifier with a fan and extra features. Although this means extra money, the cash will be worth the results in the end.
If you only have a slight problem with humidity and moisture, you can probably get great results when making your own homemade dehumidifier. These products are easy to make, and they cost a lot less money in the short term. Your homemade dehumidifier is also great for the environment because it doesn’t rely on any electricity.
Homemade vs Electric
Remember that a homemade dehumidifier will only dehumidify your house to a certain extent. If your humidity levels are higher than most, you might need to invest in an electric dehumidifier instead.
Electric devices can deal with higher amounts of moisture and humidity, and they often come with additional benefits, like the option to reduce heat with an in-built fan. It will also have a sink to store leftover water after it’s been collected, so you don’t have to empty your homemade dehumidifier yourself constantly.
An electric dehumidifier will help to manage heat and temperature levels with a fan while removing the extra moisture from your home, provided that you follow the instructions. Because of this, it may make sense to buy one if you have the money. However, if you want to make something better for the environment, the instructions above should help you create a fantastic dehumidifier yourself.
Make Your Own Dehumidifier
Now that you know how to make a dehumidifier, you’ve got some cheap and easy-to-use options for assembling your DIY dehumidifying system. Most people think that the rock salt homemade dehumidifier is best, as it’s great for reducing the relative humidity in a home. Aside from rock salt, you can use some other options for making a dehumidifier like baking soda, charcoal, calcium chloride, or silica gel.
How will you make your DIY dehumidifier? Have you already made one? Tell us about your experience below!
Rebekah is a writer who loves to explore new products and find hacks that make life easier. She has a knack for all things home improvement, health and fitness. So you’ll often find her on Pinterest or browsing Houzz for ideas.
She’s always looking for the next thing to fix up around the house or what gadget might be just right for her lifestyle. Rebekah enjoys exploring new recipes, taking care of her family, and making sure she stays healthy with regular workouts at the gym.