Last Updated on
For many people, ice cream is their favourite dessert cuisine, especially in the hotter summer months. If you love ice cream, the chances are high that you have wondered about how it is made and whether or not you can make it yourself. If so, you may be surprised to learn about how easy making ice cream at home can be, even without any kind of ice cream maker.
This article will teach you how to make ice cream without an ice cream maker, provides you with two ice cream base recipes, and offer you some helpful tips to get started. After reading this article, you should be able to create no-churn ice cream expertly without the need for a particular ice cream maker.
Getting Started
Do I Need an Ice Cream Maker?
Actually, no, you do not need an ice cream machine to make ice cream at home. In fact, you will find many homemade ice cream methods that don’t require any machines at all. If you know how to make ice cream the right way, making it without a machine can actually be fairly simple.
What Does No-Churn Mean?
You may have heard of people referencing no-churn ice cream, but what does that actually mean?
No churn ice cream refers to ice cream made without an ice cream machine. Homemade ice cream still needs to be stirred or churned per se, but there is no need for a specific ice cream churner. So basically, most homemade ice creams are no-churn, including the ice cream we will teach you how to make in this article.
What Is the Ice Cream Base Recipe?
Ice cream recipes start with a base mix that can be built upon to make different flavours. The two ice cream base recipes we list below are great for beginners and can be accomplished with minimal effort in about 4 to 6 hours.
Ice Cream Base Recipe #1:
This first recipe for an ice cream base mixture uses just three ingredients. It makes creamy ice cream, but with so few ingredients and no preservatives, it has been known to melt a bit faster than other base recipes.
- 14 oz sweetened condensed milk
- 2 cups heavy whipping cream
- 1 tsp vanilla extract
Ice Cream Base Recipe #2:
This second recipe is more similar to a recipe that would be used in an ice cream machine. It includes a few more ingredients, but many people think they are well worth it. Salt and ice react particularly well in an ice cream base recipe. Salt lowers the freezing point of ice when it starts to form and absorbs heat from the cream, resulting in a more consistent frozen ice cream.
- 1.5 cup milk
- 2/3 cup sugar
- 1/8 tsp kosher salt
- 1.5 cups heavy cream
- 1 tbsp vanilla extract
The base recipes described above make vanilla ice cream. However, you can add almost any ingredients you like to the base to create different flavour ice creams. We recommend starting with the basics first, though, so you don’t accidentally overdo it and have trouble with the freezing process. If you’re very keen to try out different flavours, we recommend continuing your ice cream making by trying out flavours like chocolate ice cream by adding cocoa powder or maybe making strawberry ice cream by adding a few frozen strawberries.
What Else Will You Need?
Aside from the above ingredients, you will also need a few additional supplies.
What You’ll Need:
- Freezing containers
- A sturdy whisk or a hand mixer
- And, of course, a freezer
How to Make Homemade Ice Cream Without a Machine: Step-By-Step Directions
Step 1: Mix the Chilled Ingredients
Start by mixing together your ice cream base or custard base ingredients. To help you make creamy ice cream with as few ice crystals as possible, always start with chilled ingredients. This will also help the ice cream freeze much faster.
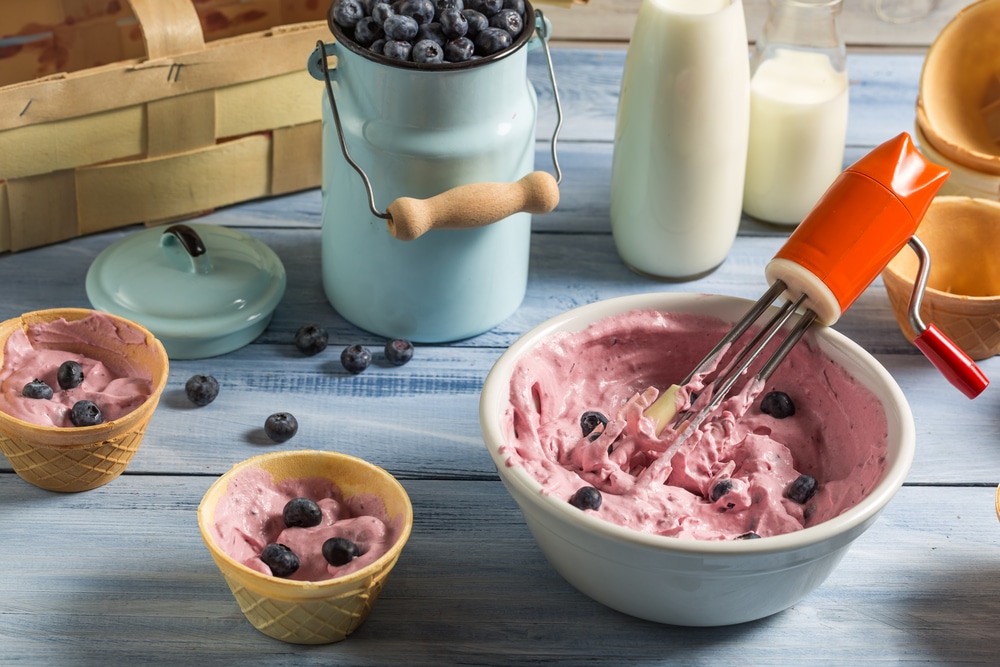
If you are using the simple three-ingredient base recipe from above, you will want to whip the heavy cream first. You can choose to do this by hand with a whisk, but we prefer using a hand mixer or stand mixer until the cream forms stiff peaks. Then, gently fold the whipped cream in with the sweetened condensed milk, vanilla extract, and any other desired flavourings like chocolate. When the whipped cream is thoroughly mixed with the other ingredients, move on.
If you are using the slightly more involved base recipe of ingredients from above, you can simply combine all of the ingredients in a large bowl and stir thoroughly with a large spoon or mixer.
Step 2: Pour the Ice Cream Mixture Into a Freezing Container

When your ice cream mixture is ready, it is time to start freezing it. Slowly pour the mixture into a freezer container of your choice. You can use a large lasagna baking pan, a bread loaf pan, or a sealable glass food storage container. Whatever you have that is freezer-safe will work. However, keep in mind that a metal pan will freeze your ice cream faster than a glass pan.
You could also try freezing your ice cream mixture in a quart-size resealable bag. The plastic bag will let you monitor the progress of the mixture more closely and can also be fun for teaching kids about frozen foods.
Pro Tip: Shallow or small containers help reduce the overall freezing time and help reduce larger ice crystals from forming, which can alter the consistency.
Step 3: Freeze for 90 Minutes, Then Whisk
Place your container or containers in the freezer and wait for 90 minutes. Make sure your freezer is cold enough to freeze the ice cream somewhat rapidly.
After 90 minutes, remove your ice cream from the freezer and mix it vigorously using either a whisk or a hand mixer. Make sure you pay attention to the corners of the pan and take the necessary time to break up any large ice crystals that are forming.
If you chose to freeze your ice cream in a plastic bag, you could simply shake the bag vigorously to achieve the same effect.
Step 4: Freeze for 30 Minutes, Then Whisk
As soon as you are done mixing, return your ice cream to the freezer. You don’t want the mixture to start thawing out completely. Wait for another 30 minutes so that the cream mixture can freeze again, and then remove it from the freezer to whisk or mix it. Just like last time, take some time to break up the ice crystals that are forming. This will help to produce a more consistent, creamy ice cream in the end.
Step 5: Repeat Until Evenly Frozen
Repeat step #4 until your ice cream is evenly frozen. After about 4 or 5 more repetitions, your ice cream should reach a soft-serve consistency. However, this will vary depending on how cold your freezer is.
When it reaches soft-serve consistency, you can choose to start enjoying it right away, or you can continue freezing it for a couple more hours until it reaches the desired consistency or, at least, reaches more of a hard-pack consistency. If you choose to continue freezing your ice cream for a few hours, there is no need to continue mixing it. Of course, the more you whisk the mixture, the fluffier the finished ice cream will be – so the choice is yours.
Pro Tip: Homemade ice cream becomes very hard when left in the freezer for an extended period of time, so you may want to take it out of the freezer to let it soften before attempting to scoop or eat it. Typically, about 10 to 15 minutes should be plenty of time.
Other Things to Consider
How Long Will Homemade Ice Cream Last?
Homemade ice cream can last for a few months in a freezer if it is tightly sealed. This is why some people choose to start by freezing their ice cream in sealable food storage containers. While plastic wrap can keep your ice cream safe from freezer burn for a few days, a tighter seal is recommended if you plan on storing your ice cream for an extended length of time. The right containers will also allow you to make more ice cream per batch.
Adding Flavours to Your Ice Cream Recipe
Once you have a good grasp of how to make basic ice cream without a churner, you may want to start experimenting with flavours by simply adding toppings. If you add toppings after the ice cream is made, you can give yourself a few tries to get it right before complicating the process.
Some of our favourite toppings and flavours to mix in include mini chocolate chips, peanut butter, fresh strawberries and other fruits or berries, caramel drizzle, chocolate drizzle, and of course, sprinkles.
No-Machine Ice Cream Made Easy
Now that you know how easy it is to make ice cream without a machine, what kind of ice cream do you think you will make first? Will you use the simple three-ingredient base recipe with a slightly more involved preparation process? Or will you go for the more elaborate recipe with an easier prep process? Either way, delicious ice cream could be in your future.
Let us know what you think and how you get on in the comments below.
Emily is a woman of many talents. She has a B.A. in English and enjoys writing. Emily loves accessorising her home with quality products that not only serve a purpose but also enhance the overall convenience and tranquillity of her living space; there’s nothing like coming home to your own personal sanctuary after a long day! She loves anything that can make life easier or more comfortable—from dishware to furniture to lighting fixtures.