Last Updated on
Do you love gardening? Then it’s time to keep your tools sharp for the best results. Without sharp tools, you could do more damage than good when tending to your garden. In today’s article, we’re exploring how to sharpen garden edging shears for smooth execution.
Steps to Sharpen Hedge Shears
Below are some step-by-step instructions on how to sharpen your garden tools for an entire edge evenly cut. Make sure to wear safety glasses and thick leather gloves when sharpening your blades for maximum protection.
Using a File
The most common way to sharpen the flat side of a blade is by using a file.
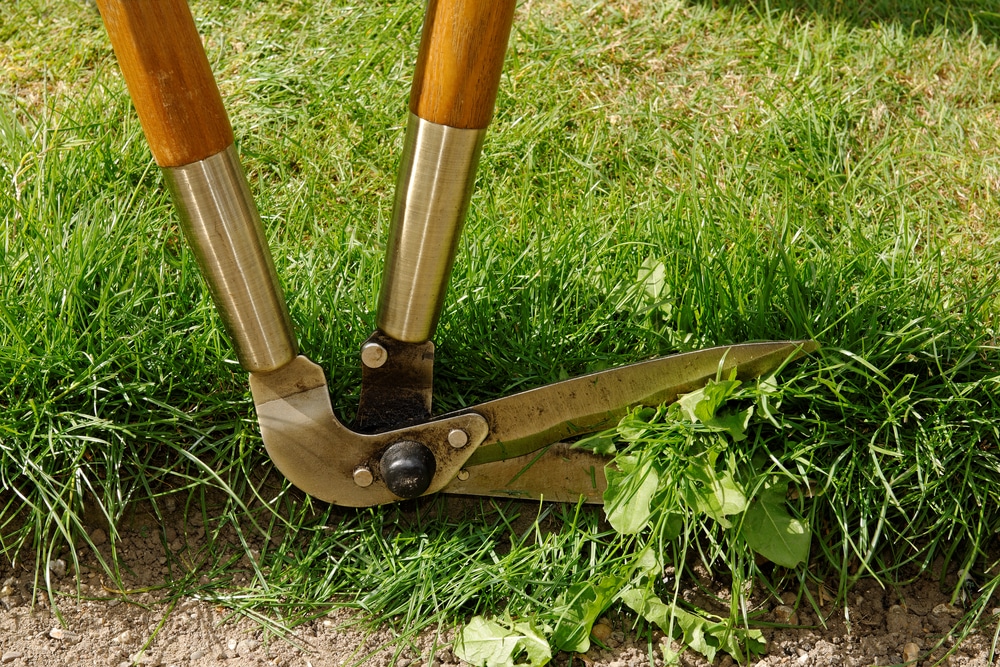
Step 1: Secure the Shears
Safety is the most crucial factor when sharpening tools, which is why we want you to provide a safe and secure space for your garden shears. If possible, brace them against a workbench or a vice with the blade you intend on sharpening pointing upwards and the blade facing towards you. Ensure that the blade is facing away from you for maximum safety.
Step 2: Find the Right Angle
Once your garden shears are properly secured, it’s time to find the right angle before you begin sharpening the blades. Be sure to follow the single bevelled edge (you can spot this by looking for the edge that’s slightly angled and forms a sharp ridge). You shouldn’t need to work on the other side, which is flat and shouldn’t be sharpened.
Step 3: Begin Filing
Now that you’ve secured your lawn edging shears and found the right angle for sharpening, you can begin filing the blade. To do so, start at the top of the blade with a metal file and use long, smooth strokes, moving the file down to the blade’s tip and keeping the file flat against the blade. All the while, ensure that you push the file away from you without dragging it back up, or you could risk damaging the blade and the file and keeping it at the same angle. Once you’ve followed these steps several times, you can adjust the angle until you’ve filed the edge evenly.
You’ll be able to see it working as you expose the clean metal underneath, and the blade will look shiny where you have filed it down.
Then, turn over the shears and repeat the process with the other blade, using the same angle and direction.
Step 4: Lightly Sand the Surface
Now that the blades are sufficiently filed, you’ll want to sand the surface across to remove any grit and debris. We recommend using medium-grit sandpaper or some steel wool to remove metal burrs caused by the sharpening process.
Step 5: Finish Up With Some Oil
The final step is to enhance the garden shears. Lightly oil the surface to keep any rust away and improve the durability of the pruning shears. It also adds a lovely shine to the blades and enhances the overall look.
Using a Grinding Stone or Drill Attachment
Alternatively, you may wish to use a grinding stone. Since this is a power tool, it’s even more important that you protect your eyes when sharpening. You always want to be cautious that the metal ends don’t heat up too much, which could cause the blade to be misshapen. To prevent this from happening, dip the blades in cold water.
Using a Sharpening Stone
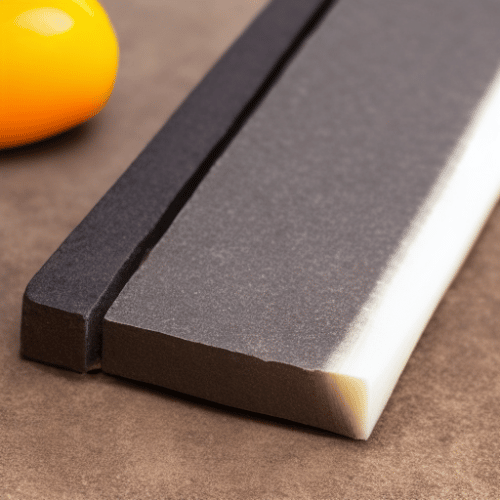
Another effective way to keep your shears in tip-top condition is to use an oil or honing stone. Either way is available at a hardware store, or you can purchase it online. To do so, slide the blade along with the stone in one smooth direction. Continue along the same edge until you notice the blades appearing sharper and shiny, and then move on to the other blade.
How Do You Know When the Blades Are Sharp Enough?
You must know when to stop sharpening shears to not apply too much pressure to the blades or risk any potential damage to your gardening tools. You never want to use your fingers to check if the blades are sharp enough; however, you can gently feel the edge of the blade and move your finger perpendicular to the edge.
Alternatively, you can check if the blades are sharp enough by looking at the bevel (this is the blade’s sharpened edge). You want to ensure that the blades have the same level and angle they had when you purchased them; sharper is not always better. Duller blades will usually have a shorter bevel along with a wide angle—usually around 30 degrees. On the other hand, sharper blades boast a longer bevel and narrow angle—around 15 degrees.
You can also do a test cut, see if it cuts cleanly, and manage thick branches. If they are cutting better than they were before, you have done a good job.
The Benefits of Sharpening Garden Shears
What’s all the fuss about with caring for your garden tools? Is it that important to sharpen shear blades? Below are just some of the benefits of not ignoring sharpening blades.
Easier to Use
Don’t you want your time spent gardening to be as pain-free and easy as possible? Fortunately, a sharp edge on your tools can make your gardening accessories much easier to use. With this comes many benefits, such as limiting your stress, getting the job done quicker, and even preventing injury. Thanks to a sharper cutting edge, the shears can cut easier, which also limits the amount of manual effort you have to put into gardening.
Safer Gardening
You might have heard that blunt blades are more dangerous than sharp blades, which makes sense because you have to press harder to experience a sharper cut, which requires more pressure meaning that you have to force the shears. As a result, you’re more likely to cut yourself than using sharp shears, as well as damage your plants.
Prevent Rust Buildup
Who wants their gardening tools to get rusty? Not us! Not only do rust and bacteria not look pleasant and can ruin your tools’ longevity, but a buildup of rust can spread diseases onto your plants.
Caring for Garden Shears
Aside from ensuring that you regularly sharpen your shears in one direction, we recommend some other general caring tips for these gardening tools.
Regularly Clean Them
You’ll want to keep the two blades in the best condition, which involves regularly cleaning them to remove rust, remove burrs, and remove any dirt and debris. As a general rule of thumb, make sure to rinse your shears after every day. Doing so will help to keep the blades sharp as well as remove any infected soil particles that can have a part to play in killing plants in your garden.
It’s expected that your gardening shears will become dirty after you’ve used them on trees or shrubs, but running the tool under clean, running water will remove any excess leaves or residue from branches. Ideally, you should remove one side of the blade at a time if you can dismantle them. It will enable you to obtain a thorough clean and reach into all areas of the blades.
For times when your blade firmly picks up a lot of soil and debris—including stuck-on materials—you can run the entire cutting angle under a hose; use the forceful stream of water to help to remove any residue. In addition, you may want to use a stubborn wire-bristle brush to help remove any marks and debris. This last process might be recommended if you haven’t cleaned the entire edge in a while or never have.
Disinfect the Shears
Who would think that you have to disinfect the blades on your shears when they’re constantly exposed to dirt in your garden? But using a disinfectant on your garden shears is incredibly important for removing physical soil and debris as well as sterilising the tool to keep them free from bacteria that could become harmful to plants.
Ideally, you’ll both clean and disinfect your gardening tools to prevent any diseases from spreading to other plants. We recommend using chlorine bleach because this solution is cheap to purchase and effective. Best of all, it works great at eliminating viruses.
Remove Rust
It’s not uncommon for your gardening tools to gather rust, but this isn’t ideal for the longevity of the tools or the health of your plants. Below are some ways to prevent a buildup of rust over the years:
Black Tea
Step 1: Pour the Brewed Tea Into a Tray
Once the tea has cooled, pour the black tea into a tray.
Step 2: Soak the Shears
Then, allow your shears to soak in the tea for a few hours (consider the time limit based on how rusty your shears are).
Step 3: Remove the Shears
After the time has passed, remove the shears from the tea and wipe away any residue with a clean rag. You don’t need to rinse the tools with water.
Wax Paper
Another common way to remove rust from your tools is to use wax paper and rub it along the blades’ surface. It is an appropriate method if your tools are exceptionally dirty or rusty. All the while, this method helps to protect your tools from future rust as it acts as a protective wax.
Storing Them Properly
You can’t expect your shears to be in the best condition all the time if you don’t store them correctly. Keep them in an indoor area where they’re not exposed to the weather, and ensure that this area is well-ventilated.
If you use our shears often, you’ll want to keep them readily accessible while keeping them in a safe position. For example, keep them stored on a wall but at head height so that they’re not too high they could fall down and land on you. And, under no circumstances should you leave them on the floor.
What Gardening Tips Do You Have?
Those are all tips on how to sharpen garden edging shears. Keeping your tools sharp across the whole edge can improve your gardening, increase your safety, and protect the health of your plants.
Keep your cutting edges in good condition by using a file to follow the edge and sharpen the blades. If you have any additional tips you’d love to share, leave your feedback in the comments.
Amy is a U.K.-based writer and editor with a penchant for helping consumers find the best home products for their needs, as well as providing easily digestible guides for living better at home. Her dedication to her work means she can usually be found elbow-deep in research or hunting down samples of the latest and greatest on behalf of her readers.
An avid DIYer herself, Amy’s passion lies in teaching others how they too can achieve their dream homes by tackling some of those pesky projects themselves! Whether it’s building furniture from scratch or turning an old dresser into a coffee table, Amy is always happy to share what she knows about making your house feel like home without spending a fortune.