Last Updated on
Want to enhance how your garden looks this summer? You probably already own a rake and a mower, but did you know that you also need to scarify your lawn to keep it healthy? Read on to discover how to use a lawn scarifier, as well as some general tips in lawn care.
Step-by-Step Guide on How to Use a Lawn Scarifier
Below is a simple-to-follow step-by-step guide on how to use a scarifier—whether you have petrol, electric, or hand tool.
Step 1: Remove Stone and Debris From Your Lawn
To improve the results of scarifying and avoid these materials from being stuck in the machine, prepare your lawn for the process by gathering garbage, dead leaves, and stones from the ground. Skipping this step could be dangerous as the equipment could swallow hard stones and then spit them back out, causing injury.
Step 2: Adjust the Blades
Before scarifying grass, ensure that you’ve moved the tool’s blades to the highest setting. Otherwise, using a low setting on your turf can cut deeper than expected on your lawn, which can make a complete mess and be difficult to recover from. Try an inconspicuous spot on your lawn to test out the different settings on the machine before you take on the entire lawn.
Step 3: Set the Working Depth
As well as the blade settings, you want to adjust the working depth according to your garden. As a general rule, you want the working depth on the flattest possible setting. However, this setting isn’t universal, and it depends on your soil’s condition, but it should usually be between 3 and 20mm.
Furthermore, when you need to change the scarifier’s direction, push the bar down, so the blades don’t make contact with the lawn as you turn, which could ordinarily lead to damaging the grass.
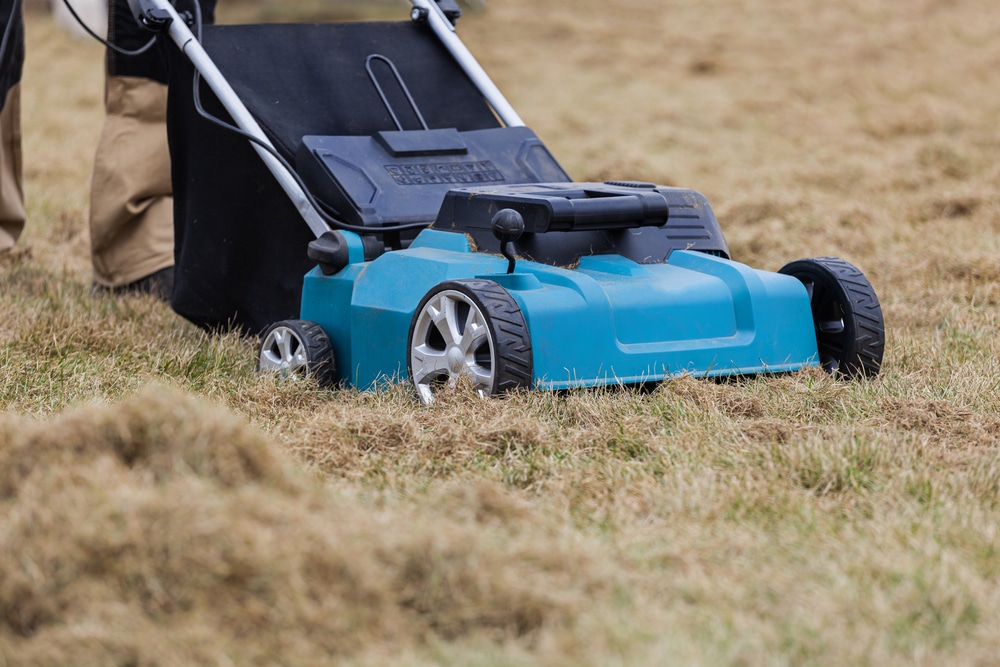
Step 4: Use Your Scarifier Like a Mower
Operating a scarifier works similarly to using a mower. Ensure that you move the machine quickly and don’t keep it on one spot of your lawn for a long time, as this can damage your turf.
Tips When Scarifying Your Lawn
As the above steps, below are some general tips to keep in mind when you next scarify your lawn.
Cut Your Grass
Make sure your lawn is mowed before scarifying it. Doing so will not only save you a job later but will remove any excess grass from your garden, allowing the scarifier to reach through any patches of thatch with ease.
Check the Soil Is Moist
Before scarifying a lawn, you should check that your lawn is moist without being too wet. If your lawn is too wet, this can result in the lawn scarifier pulling up grass from its roots—and not dead grass—instead of removing moss or thatch.
Add Seeds After Scarifying Your Lawn
After lawn scarifying, you want to indulge in some lawn care, which involves overseeding your lawn. Adding additional grass seed to your lawn after using a scarifier can reduce weed growth and create a healthy, green surface overall. And we all know that a healthy lawn is less likely to have moss and weeds in the first place.
Consider the Weather Conditions Before Scarifying
Before you get out of the scarifier, you should check that the weather conditions are just right for this process. You may even need to wait a few weeks before using a scarifier if the weather is too hot or cold. Scarifying can be stressful for your lawn, so you want to ensure that your garden receives enough sunlight and water after the process. In fact, sunlight and ample water (whether that’s from rainfall or using a garden sprinkler) can speed up the recovery process as well as prevent moss from growing after you scarify.
Don’t Scarify on Slopes
Not every lawn has the perfect conditions for a scarifier. In fact, many lawns have uneven surfaces and slopes. But you should avoid using a scarifier on slope surfaces because the rain could wash away any grass seed you’ve placed down.
Use Moss and Weed Killer
A week to two weeks before you plan on scarifying your lawn, apply moss and weed killer to your garden. This product will help to limit the amount of time and energy required for scarifying. Above all, a moss killer ensures that all moss is no longer alive when you come to scarify. Because if not, you could drag moss roots across your garden, causing moss spores to spread everywhere on your lawn, resulting in a mess that’s way worse than when you started.
The Best Time to Scarify Your Lawn
When is the best time to scarify your lawn, and does the timing really matter that much?
Indulge in moss removal during the spring or autumn months to prepare your lawn. Spring is the best season to complete this chore because the weather isn’t too hot to dry out the soil while also allowing the potential for rainfall.
However, if your lawn has a heavy amount of moss, you’ll want to endure severe scarifying in autumn. It is because heavy scarifying will result in thinning your lawn, leaving the soil exposed in several areas. By scarifying in autumn, you’ll prevent a bulk of several years of weeds, and executing this task in spring means that you’ll replace moss with a weed problem. However, don’t scarify in autumn if your turf is already looking thin because this could make your lawn worse when it comes to the following year.
We mentioned previously that you should apply grass seeds to your lawn after using a scarifier and that your lawn needs sunlight for the seeds to grow properly and healthily. Using an electric or petrol scarifier in autumn can reduce grass health if you have trees because they’ll begin to shed their leaves, minimising light that would ordinarily contribute to good health.
Do You Have Advice on Healthy Grass Growth?
Ensure that you prepare your lawn by removing any visible debris. You should also mow your lawn and ensure the soil is moist before using any tools on your grass. Follow these tips to get the best results when scarifying your garden, and you’ll be enjoying green, healthy grass all year round.
Do you have any additional advice to share? Let us know in the comments.
Amy is a U.K.-based writer and editor with a penchant for helping consumers find the best home products for their needs, as well as providing easily digestible guides for living better at home. Her dedication to her work means she can usually be found elbow-deep in research or hunting down samples of the latest and greatest on behalf of her readers.
An avid DIYer herself, Amy’s passion lies in teaching others how they too can achieve their dream homes by tackling some of those pesky projects themselves! Whether it’s building furniture from scratch or turning an old dresser into a coffee table, Amy is always happy to share what she knows about making your house feel like home without spending a fortune.