Last Updated on
A wood chisel is a handy tool to have in your arsenal and should not be taken for granted. It has a plethora of uses, many of you may not know about. If you need to chop a piece of wood, make specific cuts, or carve something, then a chisel is your new best friend.
Here’s everything you need to know on how to use a wood chisel!
What Is a Wood Chisel?
A wood chisel is a tool that makes it easier for you to carve and cut wood items. There are various wood chisel uses; however, you have to use various chiselling techniques to work on wooden surfaces to get different results. Wood chisels work hand in hand with other woodworking tools to make different types of cuts. Examples of such woodworking tools include mallets and sharp utility knives. For instance, a mallet can strike a chisel with a certain force, driving the chisel into a wooden surface.
Moreover, wood chisels can be placed at different positions while cutting wooden accessories to get different results. A wood chisel should be sharp enough to slice through wood without damaging the natural grain. If you have a dull chisel, sharpen the edge before you start using it; you can use different tools to make it easier for you to sharpen your chisel. Examples of such tools include honing guides, sandpaper, and grinders.
In this post, we will show you how to use a wood chisel on wooden items.
Different Cutting Techniques
Here are the different types of cutting techniques that can help work on wooden items:
Chopping a Wooden Item
As the name hints, this is chopping off a small chunk of wood from a wooden item. You have to use a mallet and a chisel in this technique to get superb results.
Place the Chisel on a Wooden Surface in a Vertical Position
Secure your workpiece on a strong bench before you start cutting it. The workbench should not be moving or swaying from one side to another as you are chiselling wood.
In this process, you have to place the bevel on a flat wooden surface, and then hold the chisel firmly. Grip it firmly with your hand in a vertical position. It should be perpendicular to the wooden surface or workpiece that you are planning to work on.
Place the Bevel on Scribe Line
To get effective results, you have to place the bevel on the scribe line of the workpiece. It also makes it easier for you to get a smooth edge. The chisel will also chop off the selected piece of wood without damaging the natural wooden grain.
Use a Mallet to Drive the Chisel
Once you position the chisel on the wooden surface, drive it into the wooden surface using a mallet, then direct the chisel to a certain side. Use some light force to strike the mallet first and then apply more force to achieve the desired depth. Drive it deeper into the surface until it penetrates deep to the depth you plan to chop off.
Remove the Wood That You Are Chopping
If you plan to chop a big piece of wood by making a huge cut, you have to cut it in small shallow sections, removing small amounts of wood. For instance, if you want to drive the chisel into a 10cm thick piece of wood, you have to drive it 4cm into the wood, then cut it from a horizontal plane. After that, drive it again into the piece of wood (4cm deeper), then cut it again from the side.
It is much easier to chop wood in smaller sections than chopping it off as a whole block. Plus, chopping wood as a whole block can deteriorate the wooden grain.
Mortise Cut
A mortise cut makes it easier for you to create a recess to join different wood pieces to create joints. With a chisel, you can easily create a mortise for joining various items to the wooden surface.
Trace the Outline
Start off by tracing the outline and shape of the item you plan to fix on the wooden surface. The outline of an item can guide you as you are using a chisel to make basic mortise cuts. For example, if you plan to fix a hinge on a wooden surface, you have to trace its outline using a pencil or a sharp utility knife. In some instances, such cuts are used to create notches for accommodating a hinge. The workpiece should be on a steady bench as you are tracing the outline of the hinge to improve accuracy.
Use the Chisel
Drive the sharp edge of the chisel slightly into the wooden surface in a vertical motion. Place the cutting edge on the wooden surface, then strike your wood chisel slightly using a mallet. After that, drive the chisel into the piece of wood from the side in a horizontal motion.
Remove the Wood
Tilt the wood chisel slightly. The cutting edge should come into contact with the wood at a certain angle (30 degree-angle). Knock it gently with a mallet. The bevel will slice through the wooden grain and remove some chunks of wood.
Increase the Angle
If you want to cut a big chunk of wood to create a mortise cut, you have to increase the tilt angle. However, in some instances, the natural grain of the wood might be running vertically through the wooden surface, making it hard for you to drive the chisel safely into the wood.
To cut the piece of wood and create a mortise cut, hit the chisel with a mallet using some light force until it penetrates deep into the wooden grain. Afterwards, move the chisel towards the wooden surface to lift the chunk of wood that you are chopping.
Paring Cut Technique
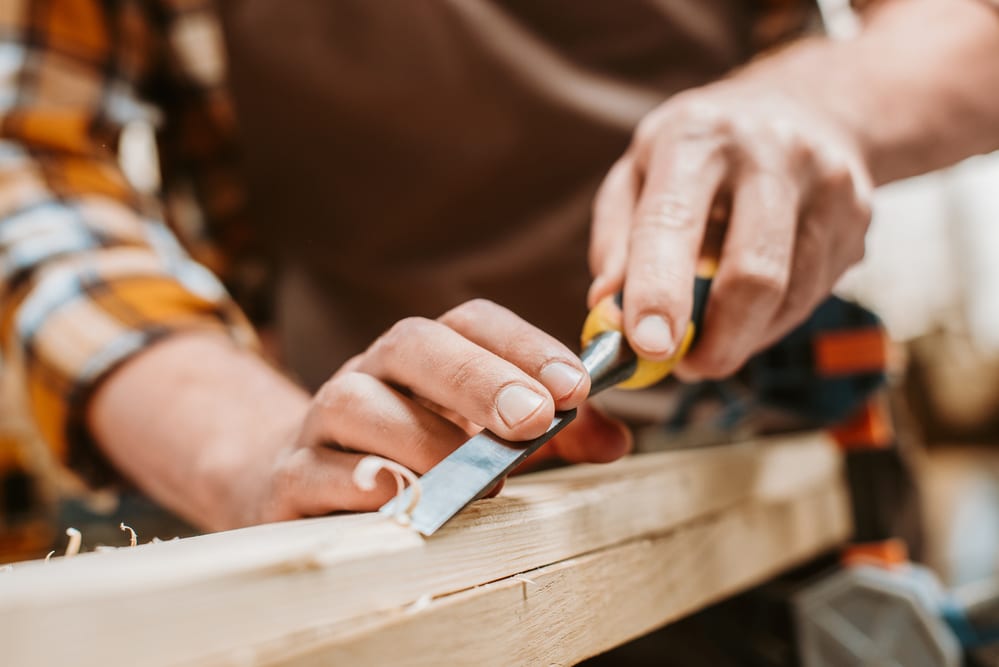
This method makes it easier for you to get even surfaces or edges by making shallow chisel cuts. The paring chiselling technique is mainly used to smooth and flatten uneven edges and surfaces with shallow cuts. For instance, if you have a piece of wood with some bumps, you can use the paring technique to remove the bumps from the wood by slicing thin shavings, which flatten the workpiece surface.
Place the chisel blade on the wooden surface. The flat side of your chisel tool should lie on the wooden surface. Then, Place the chisel flat on the workpiece. Do not use a mallet in this procedure; it might chop off the wood, giving you an uneven wooden surface.
To get effective results while paring, hold the chisel tool firmly on the surface, then use your hand to chop off thin slices of wood. Just slide the chisel flat along the wooden surface until you get an even surface by removing thin wood slices.
Scraping
Scrapping is an effective chiselling technique, which makes it easier for you to get rid of some of the defects on a wooden surface.
Place the bevelled edge of the chisel blade on the wooden surface to be perpendicular to the wood grain. Hold the wood chisel vertically in a strategic position; the flat side of the chisel blade should be facing you.
Apply some light pressure on the chisel using your hand. Slide the bevelled edge of the blade along the wooden surface to scrape off the material that might be on the surface (paint, debris, and glue).
You have to use a sharp chisel blade to remove such defects from a wooden surface. Plus, the bevel should be completely straight and free from defects. If the bevel is crooked, it might damage the wooden surface, leaving different marks on the surface. Sharpening a chisel blade may help you restore it back to its previous condition. Plus, sharpening the chisel blade makes it easier for you to make different basic chisel cuts. A honing guide and sandpaper can work together.
Chop and Pare
This technique helps you to create various joints for creating wooden appliances. To create a joint, you have to saw the piece of wood lightly to a certain depth. However, before you start the procedure, you have to mark the section you plan to work on.
Draw some straight lines across the plank of wood with a pencil or a wood marker. Place a saw on one of the lines, then cut through the wooden surface to a certain depth. Repeat the same procedure on the next line. Once you have sawed it, place the bevelled edge on the surface of the workpiece.
Afterwards, place a blade on the plank of wood at a certain angle, making it easier for the chisel to remove wooden pieces from the plank. Hit it with a mallet, then remove wooden chunks from the sections you had cut earlier.
Get a Chisel
As you can see, a chisel is a flexible tool that is quite effective in various tasks. From making notches in wood to cutting planks, once you learn how to use a wood chisel, you will be amazed at what you can use it for.
The blade of a chisel should always be sharp as you are cutting wooden planks. Working with a blunt chisel blade can be quite hectic and cumbersome, and it could even cause your wood to split and break. What’s more, it will also make your job harder! You have to be sharpening it regularly to get superb results.
Ian loves everything that revolves around the home improvement niche. He loves trying out new home appliances. He has also handled a lot of equipment and has a lot of insight. Plus, he’s worked on various home improvement projects that became a success.
If Ian isn’t busy working on his latest project, you can find him reading up about another one!


