Last Updated on
Have you ever asked yourself? How does an embroidery machine work?
Embroidery, existing for many decades now, is an engaging and exciting hobby for many people. Long before the industrial revolution, many embroidery lovers could only experiment with designs and stitches by hand. However, as the world began to change and new technology emerged, people discovered the use of machines, making various aspects of embroidery easier.
As a kind of sewing machine, an embroidery machine allows you to tackle some of the more complicated embroidery components. Today, we’re going to discuss how to use an embroidery machine and how it works.
How Does an Embroidery Machine Work?
In contrast to hand stitching, machine embroidery provides a fantastic approach to creating designs.
You don’t have to be an expert in detailed sewing to use an embroidery machine. However, you might find that it takes a while to learn how to use it correctly. It’s also worth noting that while machine embroidery can accomplish a lot, you might still prefer to handle some tasks by hand.
Embroidery machines can come in a range of shapes and sizes, with various abilities. Some are simple, while others are more complex and expensive. If you only plan to embroider, then you can get a machine that offers embroidery only. Specific devices can offer both embroidery and sewing.
An embroidery machine works by simplifying the way you complete various embroidery tasks. You can set the device up to accomplish multiple things, just like a sewing machine. However, unlike a sewing machine, embroidery machines come with unique features, like hooping tools, excess stabiliser tools, embroider arm components, and pre-set designs, among others.
The Components of an Embroidery Machine
The embroidery process can feel a little like using a sewing machine at times, particularly if you get a device intended for both sewing and embroidery. You can use specific thread systems, various kinds of fabric, and a presser foot for controlling your stitches.
Many embroidery machines also come with patterns or designs you can implement into the machine, so you don’t have to wash away pens and make all of your designs by hand. Some of the features you might notice on embroidery machines that aren’t evident on sewing machines include the following:
Hoop Systems
Hoop systems are parts within an embroidery machine that allow you to attach a hoop to your machine to hold a piece of fabric taut. You can use a hoop instead of standard tear-away fabric so you can keep the fabric held in the right place as you stitch.
Your embroidery machine can create more intricate designs when working with a hoop. You may need to check hoop sizes to see what kind of designs and stitching you can do. Remember to check the hoop size that your machines can handle too.
Stabiliser Tools
When you’re sewing, you need to keep both your hoop and fabric steady. It is to ensure that the thread creates the kind of stitch patterns you want. There are many different kinds of stabilisers available to use with a hoop and embroidering machine.
The stabiliser you choose will often depend on the type of needle and thread you’re using, your hoop size, and the fabric you’re using.
- Some stabiliser options can be torn away or cut when your design is complete.
- Others wash away thanks to water-soluble components.
- Tear-away stabiliser tools often support woven materials like cotton.
- Wash-away stabiliser tools are better for silk and softer material.
Design Software
Many embroidery machines come with stitching designs built into a computer system within the device. You can download free software or purchase software designs for your embroidery machine’s computer system.
Design software tools allow you to create your projects for free, using an existing frame or template to get you started. You attach the file for your project to an SD card or computer USB to transfer it to your embroidery machine.
Using Your Embroidery Machine
Once you know the components of an embroidery machine, you’ll be in a better position to start working on the design or project that’s right for you. Look up some free embroidery designs online to get started, or consider checking your embroidery machine manual. Some machines come with different types of projects already built into the software.
It’s also worth checking the manual for some other reasons. For instance, your manual can contain helpful information about what kind of supplies you’ll need for different projects, what type of frame or hoops you can use, and which needles will deliver the best effects.
After checking the manual for information, you can start the setup process. For most machines, the basics will be the same.
- You may need to swap the presser foot for a freehand or darning embroidery foot.
- The next step is plugging your machine in and making sure you’re using the right needles.
- Many machines will come with a range of stabilisers, needles, and other tools already included in part of the purchase.
- If you can’t find a manual telling you which needle to use for your project, check the company’s website. You might be able to find a digital file available from the support service there. Furthermore, check for any tutorial information that can teach you the basics of different needle and thread options.
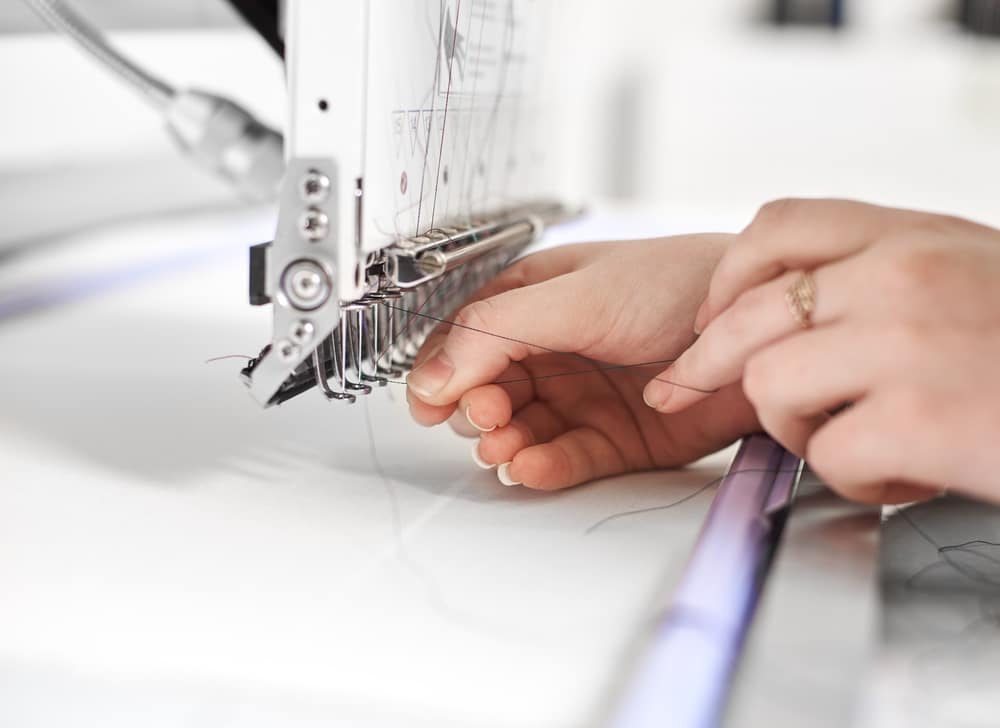
Threading the Machine and Bobbin
To make sure you are threading the machine and bobbin the proper way, follow these steps:
- Before anything else, find out what kind of fabrics and materials you can use with your embroidery machine and the hoops you’re working with. You should be able to get an insight into how you can prepare your hooped material for stitching.
- The weight of the material may influence the needles you use too. Heavy polyester and rayon will require a thicker material than silky or thin fabrics.
- Turn the machine on and connect it to your computer if you need to access a computerised design. The design you download may come with advice on hooping, which polyester or rayon material to use, and even how to have the most fun with the right needles.
- Dedicated embroidery threads and needles will give you the best results from your design. Thread the needle according to the instructions in your manual, ensuring you add any stabilisers that may be needed for the material.
If you’ve threaded a sewing machine before, you shouldn’t have a problem here.
- Like a sewing machine, you’ll also need to thread a bobbin. The bobbin will sit below the cover of your machine and blow the needle. Load the bobbin with thread and make sure that it’s fitted in place correctly.
- Your machine will use thread from the top and bottom of the machine when creating certain designs and stitches. You can get an insight into which colour of thread should go in your machine needle. You will also know which should go on the bobbin thread by checking your embroidery design. Most embroidery designs and manuals made for beginners will provide plenty of guidance.
- To see the threads correctly, pick up the bobbin thread using the wheel on your machine. Use tweezers or a pair of small scissors to pull the bobbin thread through your chosen material. Then, drape it towards the back of the embroidery machine.
Preparing Hoops and Fabric
Most machine embroidery for beginners involves using a hoop with your embroidery machine. The hoop will help to hold your fabric in place through the embroidery process. Beginners will also find it easier to get started on their design with a hoop.
Hoops and frames hold your fabric securely in place while the machine works to embroider the design. The hoop isn’t the same as the stabilisers that you can cut away, tear away, or wash later. Stabilisers are special kinds of products that help support your fabric when you’re embroidering your design.
Stabilisers are often available from sewing shops, and they’re perfect for beginners. Keep these tips in mind when cutting your stabiliser:
- Make it slightly larger than the size of the hoop for the design you want.
- With your cut-away stabiliser and hoop in place, turn the knob or dial on your hoop to secure everything into place. You can then slide the hoop into place on the embroidery arm of your machine.
- Lastly, make sure you don’t have any embroidery thread or fabric stuck anywhere.
Creating Your Design

Now that you know how to use an embroidery machine to set everything up, it’s time to begin working on your design with your embroidery thread. Embroidery needles, and chosen fabric in place, select a design for your machine to follow. You can use an embroidery design that comes with your machine to look for basic machine embroidery.
Since machine embroidery is quite popular today, you can probably find other designs to work with your preferred thread colour and fabric online too. When you’re first getting started, don’t get too carried away with different embroidery threads and designs. It’s often best to stick to one thread colour until you’re confident in your embroidering skills.
The more you work on your stitches and designs, the more threads and colours you’ll be able to use. It’s generally more fun if you start simple. However, follow the instructions provided online by companies like Brother or Rayon and pay close attention to the way your device works.
When you’re done stitching, remember to carefully remove the article of fabric from the embroidering machine, cutting any remaining threads that you need to detach.
Tips on Using an Embroidery Machine
Learning how to use an embroidery machine correctly can be a very straightforward process. However, just like any skill, machine embroidery can take some getting used to at first. Make sure you read all the instructions provided for your machine before you begin. Using it the right way will prevent you from making dangerous mistakes.
If you know someone already familiar with using an embroidery machine, consider asking them to help guide you through your first embroidery designs. Here are other tips to help you jump in:
- Start with one thread and a simple design before you get carried away with complex projects. If there are classes in your area, it might be worth signing up for one of these so you can get guidance as you work.
- Keep all your threads and other equipment organised. By doing so, you will know where to go for a different weight of thread or fabric when you need it. It’s worth having scissors nearby if you need to cut anything and an extra needle, just in case.
- Check the designs. Some files can become corrupted when you import them into your embroidery machine. Testing the design on a piece of scrap fabric will mean you’re less likely to waste the material you want to use.
- Start slow. There’s no need to go out and buy tons of materials and new designs straight away. Start slow and work on developing your confidence with the machine. The more you work on your embroidery skills, the more confident you may feel in making designs on your own.
- Don’t expect it to be the same as sewing. Remember that although embroidery and sewing machines have some similarities, they’re not the same. Even if you’re confident with sewing machines, it may take some time before you can use embroidery machines effectively.
Start Your Project
When it comes to learning how to use an embroidery machine, just like in any craft, remember that practice makes perfect. The more you work on your skills, the more comfortable you will be when using your machine. What’s more, the better you become, the more confident you’ll be in trying new designs and testing yourself!
Above all else, be cautious about how you use your machine. Never rush when grabbing a piece of thread or fabric while the machine is still on. Your fingers are more important than the fabric you want to save.
Hopefully, you find this article helpful as you try out a new interesting hobby. When you get good at it, you can even start a business with it!
Do you have other useful info on embroidery you’d like to share with others? Have you completed any embroidery projects? Tell us all about it below!
Rebekah is a writer who loves to explore new products and find hacks that make life easier. She has a knack for all things home improvement, health and fitness. So you’ll often find her on Pinterest or browsing Houzz for ideas.
She’s always looking for the next thing to fix up around the house or what gadget might be just right for her lifestyle. Rebekah enjoys exploring new recipes, taking care of her family, and making sure she stays healthy with regular workouts at the gym.