Last Updated on
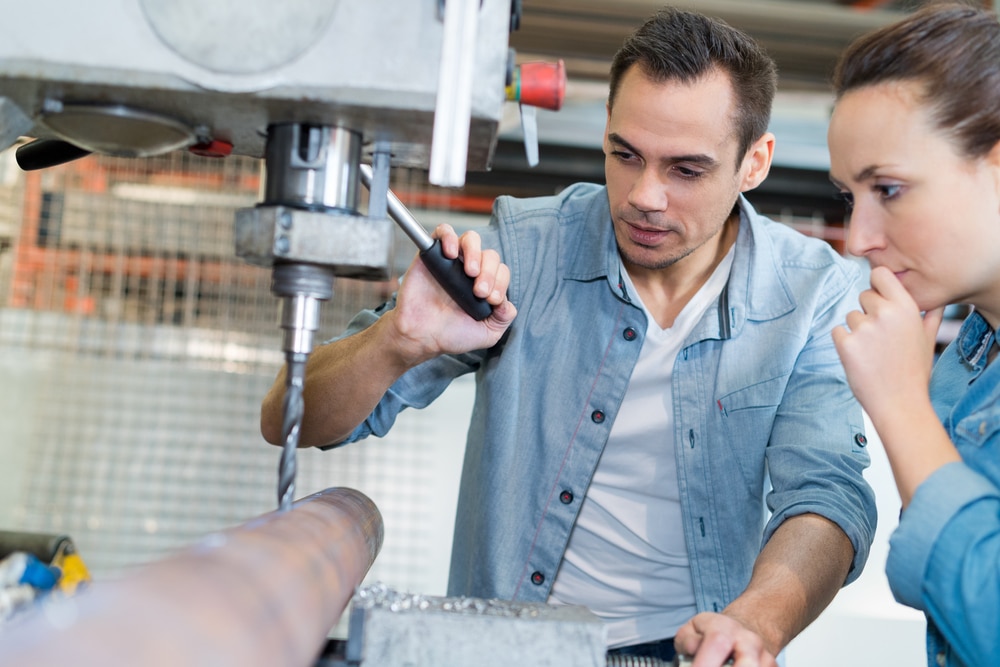
Knowing how to use a pillar drill is easier than you may imagine. The machine itself may appear somewhat intimidating, yet appearances can be deceiving.
Fortunately, in the case of using a pillar drill, there are several steps you can follow to drill holes until your heart is content. So, let’s go through those steps.
Before You Get Started
However, let’s hold on just a second. Remember that a pillar drill is almost the same as a bench drill. So, if you are checking things out online and see it referred to as a bench drill, then you know where you are at.
A pillar drill is basically a machine that contains a drill bit, which is actually fixed to a column that you can move up and down. It means the drill head can be dropped onto the item you wish to drill, and you control this via a rotating handle.
These drilling machines are simple to operate, and they are set up with no hassle.
But anyway, back to the steps.
Step By Step Guide On How to Use a Pillar Drill
Step 1: Get Familiar With the Manual
The first step is to get familiar with the manual for your machine. Now, while a pillar drill will pretty much be the same no matter the manufacturer, there may be a few differences depending on your model.
Understand where all of the important bits of the pillar drill are located. For example, where is the emergency stop button? What drill bits do you need? What are the different materials that this drilling machine can deal with?
All of these details are important to know and understand before you grab that piece of wood and get drilling.
Step 2: Get Your Safety Equipment
The next step is to get your eye protection and other safety gear ready. Remember that you are drilling holes into some type of material. Whether you are drilling small holes or larger holes, there’s a very real risk of pieces flying off that can go into your eyes.
Also, don’t cram yourself into a corner when using a pillar drill or bench drill. You need more space than you could imagine in your workshop for these machines.
Step 3: Check the Bit Works for the Material
Look at the material you are about to drill, and then check that the bit you are using matches the material. You need a certain bit for wood and something different for metal or masonry.
Step 4: Remove the Chuck Key Before Turning It On
You need to remove the chuck key before you turn the machine on. If not, then the chuck is going to fly out and fall to the floor, and that’s not a good thing.
Step 5: Check the Safety Guard
Make sure you have the drill guard in position before you proceed. The aim of this guard is to generally stop debris from flying all over the place, which is essential when you are using the different speeds that come with these drills. It should easily be lowered into place via a lever.
Step 6: Setting the Speed
Pillar drills come with different speeds, and you need to set them before you start drilling. Most pillar drills will have pulleys on the side of the machine that allows you to change the speed. Altering the speed means you have more control when you use a pillar drill. It makes it easier for you to judge how to drill the hole you need without flying through it.
Also, changing speeds will alter how the drill bit goes through the material. You don’t want things to be too slow, as the heat can cause damage to the material.
Step 7: Clamp the Item Down
Before you use this tool, you need to clamp down on whatever it is that you are drilling. It goes on the stand, and you have to lock the clamps in place. It will prevent the metal or wood from moving around on the bench. It means better accuracy, as well as improved safety when it’s being drilled.
Step 8: Make Sure It’s Lined up With the Drill Bit
Before you finally tighten everything down, just double-check that the mark you have made on whatever is to be drilled does line up with the drill head. That will then mean the drill bit will come down right on target, and this accuracy is one reason why the pillar, or bench drill, is so popular with DIY projects.
Step 9: Set the Depth Gauge
One amazing feature of this drill is the ability to set the depth gauge. It translates to the depth of the hole to be drilled, and it’s just another way of really controlling the end result.
Set the depth gauge according to what you want to do.
Step 10: The Drilling
The final step is to switch everything on and drill the hole. This tool will take just seconds to do, yet the way you can control everything will surprise you.
After you have drilled, use the rotating arm to lift the bit out of the way, switch it off, and then clear away the debris.
Other Key Points to Remember

There are several other key points you need to remember when it comes to using this tool.
First, the machine needs to be firmly set on the floor of your workshop. Find a flat area in your workshop, and set it at that location. It should be bolted down so it cannot go anywhere, as these tools are powerful, and they could move around while in operation, and that’s not a good idea.
Next, always wear gloves. You will be tempted into wiping away debris, but metal fillings are sharp and will cut you, so wear gloves to stop this from happening. Make sure they are thick as well.
Start Using Your Pillar Drill
Overall, this particular tool is easy to use, and the results are going to be outstanding. Even if you are relatively new to DIY, you should have no problem setting up this machine by changing the bit via the chuck and controlling everything via the rotating arm.
The very fact you can control how deep the hole goes, and do so with absolute precision, will open up the possibility of doing other DIY-related projects at home. There are just so many different pillar drill uses that you will be surprised at just how often you end up using it.
However, just make sure you have the space available and can position this machine in the perfect spot, as you don’t want to be moving it around too much due to the sheer size and weight of the machine itself.
Paul is the type of person who never met a problem he couldn’t fix. He can always be found tinkering with something in his house, even if it isn’t broken! His tips and tricks are often shared on our site. He’s the one you call when something breaks because he has been known to improvise fixes for everything from leaky faucets to malfunctioning dryers.