Last Updated on
Knowing how to install a wireless doorbell will prove to be easier than you may have initially expected. Thankfully, installing a wireless doorbell is something most people should do and can do so without too much knowledge or experience.
Installing a wireless doorbell is different to a wired doorbell since there’s a lack of wires. That in itself means you don’t have to worry about getting an electrician involved so anybody can do this at their home.
The Difference With a Wired Doorbell
With a wired doorbell, you have the doorbell button and the chime part. Both are close together, thanks to the fact that wires do connect both parts. The installation instructions will focus on wiring everything up, requiring some additional knowledge and experience to make sure everything is done correctly.
Most wireless doorbells will have fewer steps with the installation process, which also applies to the various smart home devices that can also include a wireless doorbell button.
I just failed at being an adult when I couldn't install a wireless doorbell button. *sigh*
— Jamie G (@OSUJamieG) March 31, 2015
The Advantage of a Wireless Doorbell
When thinking of the advantages of installing a wireless doorbell, let’s look at what you don’t need to do.
There’s no need to use electrical tape or a voltage tester. You don’t need to think about dealing with a hard-wired doorbell where you need to involve much more equipment and knowledge when trying to install it. You simply need to consider whether you will install it on your door frame or in the same location as your old doorbell.
It is really nice and simple.
The Basics of a Wireless Doorbell Installation
You have two parts with a wireless doorbell model: the doorbell button part and the transmitter. You will need to install both and sync each part as well, but we will cover that later.
The basic idea of a wireless doorbell installation is that you don’t need to fiddle around with wires. Also, the process we will take you through will apply to a smart doorbell, as they are becoming more popular.
Managed to finally drill into the front wall of death to install a wireless doorbell. The wireless bit even has a USB port, neat!
— Cllr James Moore (@tomfooled) May 15, 2016
In short, you are going to have the wireless door chime, or you may see it referred to in the manual as the wireless doorbell receiver and the wireless doorbell itself. That’s it. Two parts only.
So, let’s go through explaining how to install a wireless doorbell.
Starting the Installation Process
The first step is to know where both parts of your wireless doorbell are going to be placed. One part is at your front door, and then you need to think about where the chime part is placed.
How far apart the two sections can be is something you need to think about. Double-check if there are any restrictions depending on the manufacturer’s instructions.
You see, what you must remember is that there will be a limit as to the range at which wireless doorbells will work. The transmitter button cannot be too far away from the chime box, or nothing will happen inside when a visitor presses the button.
Exactly how far apart the chime and transmitter can depend on the wireless doorbell system, you are installing. Check the manufacturer’s instructions to see the maximum distance at which they can be placed. It may be the case you need more than one chime box in place to complete your doorbell installation then.
So, let’s go through the rest of the steps.
I bough a wireless doorbell, this is the remote pushbutton. A thread. pic.twitter.com/mzDUBrgwdu
— Ivan Miranda (@adnarimnavi) June 29, 2020
Step by Step on Installing a Wireless Doorbell Properly
Step 1: The Batteries
Both parts of your wireless doorbell are likely to be battery-powered, so it makes sense to start here with the installation. Sometimes the chime can be plugged into the mains, so choose an appropriate location near a plug socket.
Check you have the correct batteries ready, and remove the back cover to access the battery compartment. You may need to undo some screws to access the back of the button unit to insert batteries into the correct compartment then.
Once you do this, don’t completely close up the compartments, as you will need to carry out another step as part of the installation process later on.
Step 2: Syncing Your Wireless Doorbells
Your new doorbell is going to require syncing between the chime unit and the push button that sits at your front door. It is to make sure there’s no signal interference between both parts, and you will hear that familiar ding-dong when someone comes to your door.
Syncing means you sit both the chime box and transmitter close together and then push the sync button on both parts. After you have done this, you are ready for the next step.
More mental accomplishment but first "project" I've done by myself, just a basic wireless doorbell 😁😁 #HomeOwner pic.twitter.com/Qs1VHC4zaM
— x – Clawser (@mClawser_) January 29, 2020
Step 3: Setting the Chime Module
Some door chimes can come with the option of choosing the sound that the doorbell makes. It is done via a chime control button. You should consider setting this sound at the initial installation and then see if you can hear the sound when it’s pressed from different parts of your home.
If you cannot, then moving the chime unit or buying more will mean your wireless doorbell will at least alert you when someone is there.
Step 4: Understand the Surface Where Your Doorbell Is Located
Another key part of the doorbell installation is looking at where the mounting bracket will be located with the push button. You need to think about the material or surface the bracket will be on to prevent signal interference.
You must remember that signals need to be sent from one part to the other as there are no wires. It is the same method that motion sensors use when you install them in your home. Unfortunately, some materials can hamper the signal, so you may not hear the chime when someone presses the push buttons, as the signal cannot get through.
The best surfaces are wood, vinyl, and aluminium doors.
Tech integration!
— Brennen Rath (@bjrath) August 28, 2018
The Wireless doorbell.
A bell, buzzer, and a friendly reminder. pic.twitter.com/jVjGsqxo2Y
Step 5: Installing the Button Unit on Metal
If you install the button unit on metal, other than aluminium, you need to either look at your doorbell options or take steps to eliminate interference.
The easiest method is to attach a piece of wood to the frame and then put the push button onto the wood. Do not put it straight onto the metal, or your wireless doorbell probably won’t work.
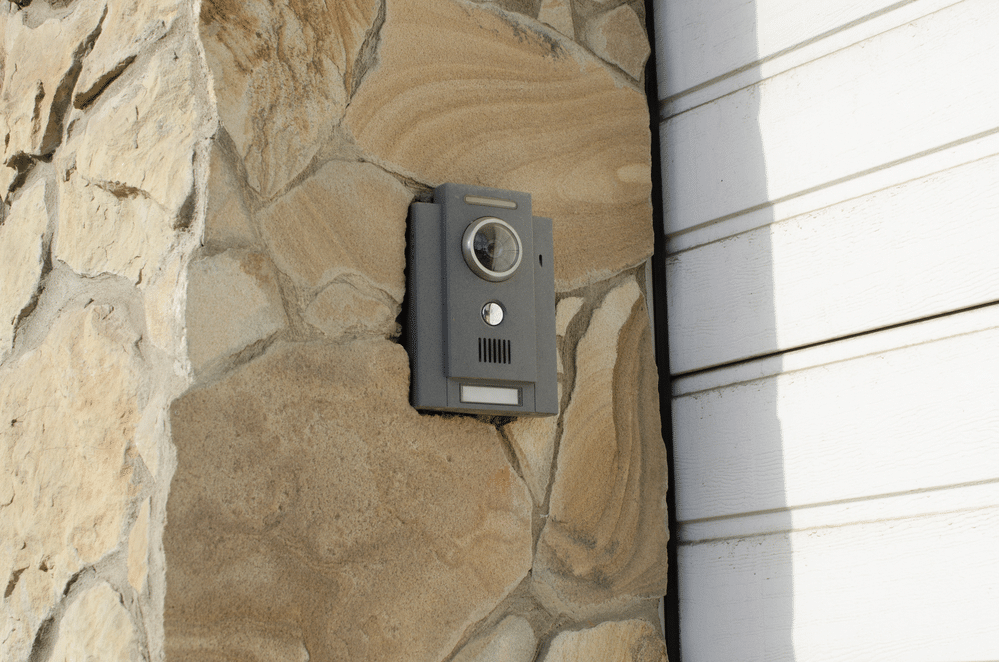
Step 6: Installing Your Wireless Doorbell on Masonry
This is another quick tip if you are installing your wireless doorbell on masonry. Also, this applies to smart doorbells as well.
If the doorbell is going on masonry or brick, placing the push button on some plastic attached to the brick via some mounting screws will make life easier. You will then install the doorbell onto the plastic. It should make it more secure.
Step 7: Attaching the Push Button to Your Door
When it comes to attaching the actual push button, you don’t have to worry about wires.
Some models provide you with strong adhesive tape that can be used to attach both parts. However, if you feel unsure whether or not this will be strong enough, then two screws, along with the appropriately sized plug, will also be supplied. It’s fairly easy to install the doorbell via these screws then.
All you need to do here is mark where the screws need to go and then drill a hole. Place the plug into the hole, and screw the back panel onto the wall. That should mean your wireless doorbell won’t simply fall off the wall at any point. However, this approach is best used when placing the doorbell on brick rather than the frame of your door.
Step 8: Placing the Receiver Inside
Keep in mind that you need to be aware of the distance from where the receiver can go. So, if you find your back door is too far away, you may need to have more than one option. It is especially true with a large house, or your doorbell will remain mute as it’s effectively out of range.
The chime unit inside your home can sit anywhere. Some people attach it to a wall, while others place it on top of a cupboard. Think about putting it somewhere that it’s not going to interfere with your daily living.
New smart doorbell for the house!#doorbellcamera #videodoorbell #smartdoorbell #wirelessdoorbell #doorbellwireless #security #moderntechnology #smarthome #door #bell #followme #technology #smarthouse #securitycameras #homesecurity #smarthomeautomation #ubiquiti #ubiquitiunifi pic.twitter.com/NJGKLtk3oi
— Robert Hancock (@l0af) June 20, 2021
Your Installation Is Complete
The installation of your wireless doorbell is now complete. As you can see, no wires are involved, so it makes sense that this method is so much easier to do compared to the hard-wired versions out there on the market.
To install a wireless doorbell, you need next to no equipment, and even less if you plan on using the adhesive strips that come with so many models. Even if you do go and attach it via screws, it shouldn’t take too long for you to complete the process.
Just remember to sync both parts before you complete the installation. Apart from that, everything should work well, and in the future, all you will need to do is change the batteries at some point, but even that shouldn’t be required for some time.
Paul is the type of person who never met a problem he couldn’t fix. He can always be found tinkering with something in his house, even if it isn’t broken! His tips and tricks are often shared on our site. He’s the one you call when something breaks because he has been known to improvise fixes for everything from leaky faucets to malfunctioning dryers.